
Impression Instruction Guide
Step 1: Mix Putties Well
Remove one set of putty (catalyst and base) from their containers. Mix together quickly but thoroughly until it's one solid purple color, without any streaks or swirls.
Timing's important here. Once mixed the putty will start to harden so try to finish mixing within 45 seconds.
Step 2: Load the Putty Into the Tray
Next, roll the putty between your palms to form a cylinder shape, roughly the same length as the groove in the impression tray.
Place the putty into the tray and spread it out evenly.
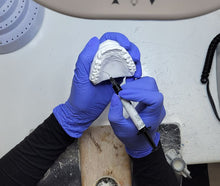
Step 3: Aim, Press & Hold
Position the tray so your teeth are centered in the U-shape of the putty. Leave enough room in the front so your teeth aren't too close to the tray wall.
Keeping the tray level, push the putty into your teeth deeply in one smooth even motion, especially in the back molars. Push in deep enough for the putty to cover the gumline.
Hold steady with even pressure for about 3-4 minutes or until the putty fully hardens. Try to hold very steady, without wiggling.
Once time's up test the putty by pressing on it with your fingertip. If it's firm, you're good to go. If still soft, hold a bit longer until it firms up.
Remove from your mouth by gently pulling from the sides. It might feel snug - that's normal. All done!
Step 4: Check It Out
You should see clear detailed outlines of all your teeth and it should be deep enough to see the gum lines. There should be no drags, distortions, or scrapes. If you're not sure, send us a photo and we'll review it for you!
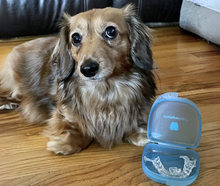
Step 5: Mail It In
Allow the impression to fully set facing up overnight, or for at least 12 hours before shipping. Do not remove the putty from the impression tray. Don't forget to fill out and include the ID card along with your impression.